Editing Interet Archive Movies with Premiere
Adobe's Premiere digital video tool is a great package and although it supports MPEG-2 for output, if you want to import MPEG, it must be in MPEG-1 format. Since the movie collection was digitized as MPEG-2 for quality reasons, some conversion is required before a movie can be edited in Premiere. This document explains how to do the conversion using a free tool - FlasKMPEG. It's worth pointing out that some hardware editing solutions such as Pinnacle's DV-1000 board allow native MPEG-2 editing in Premiere - unless you have one of these cards, you'll need to convert to the Video for Windows standard - AVI files - before you can import the movies into Premiere's timeline.
FlasKMPEG can be download from http://go.to/flaskmpeg. At press time (April 2001), there are two versions. 0.594 and 0.6 Preview. I would suggest using the 0.594 version since it's very stable - 0.6 has some problems and once these are addressed, we'll update this guide for the new version. You'll also see that there are a number of different 0.594 versions of software. The original version only uses Intel's MMX instructions to speed up the program. The Intel enhanced version is designed for the SSE2 instructions that are included in the Pentium 4 processor - if you have a P4, this version is very fast - we used this version to convert all of the movies to the DivX ;) format and were able to get 25-30 fps on a 1.5GHz P4. The AMD enhanced version takes advantage of the 3DNow instructions in the Duron and Athlon processors. I've heard that 1.2GHz Althons can do around 20 fps.
These instructions assume you're installing the generic version of FlasKMPEG 0.594 which comes as a self-extracting archive program.
Step 1 - Installing FlasKMPEG
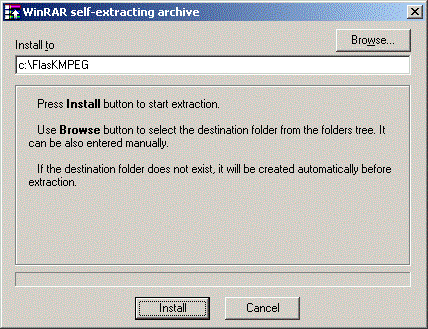
Download to your hard-disk and run flaskmpeg_0594.exe. You'll see this dialog:
Make sure the Install to field is set correctly and click Install. Once the install completes, use the Windows Explorer to locate the executable file called FlasKMPEG.exe and launch it.
Step 2 - Setting the language
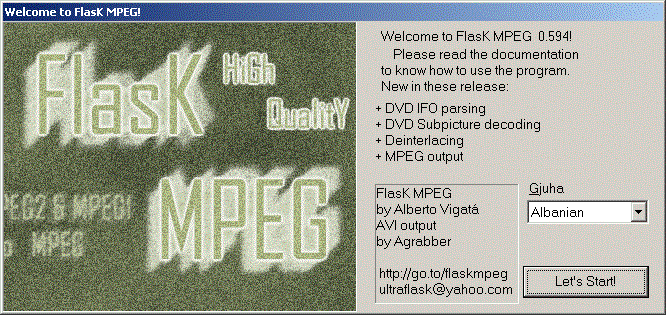
The first time you run FlasKMPEG, it will ask which language you want to use. Pay attention because if you don't set the language correctly, you'll next be presented with menus in Catalan!
Step 3 - Opening the Movie File
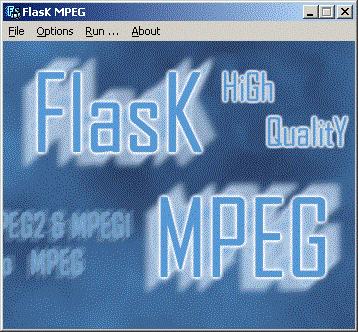
You'll next see the main FlasKMPEG window:
Click on File/Open File and point to one of the movie files - in our case, we'll use Rick's documentary about Prelinger Archives - prelarch.mpg. Flask will then analyze the MPEG-2 stream and when complete you'll see the main window again.
Step 4 - Selecting Codecs
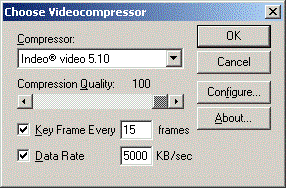
The next step is to decide which compression algorithm to use when writing AVI files. Obviously, you can decode to full-frame video, but this results in absolutely massive files - about 1MB per frame (and there are 30 frames per second!). In our case, we'll use Intel's Indeo 5.1 codec which should be installed as part of Windows for video and straight uncompressed PCM for the audio track.
Click on Options/Output Format Options and you'll see this dialog:

Click on the "Select Codec" button at the top and you'll see this dialog:
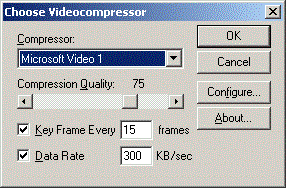
Change the options on the dialog to reflect these settings:
and then click OK. You'll see the AVI output options dialog again and now click the second "Select Codec" button:
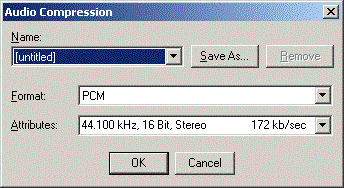
These fields should be automatically set for you but just confirm that the output sampling rate is 44.100 kHz, 16 Bit, Stereo or Mono. All the movies were use a sampling rate of 44.1kHz - even if you want to output to a format like DV that uses 48kHz, you can stay with 44.1kHz for now and let Premiere do the conversion when you Export to DV.
Click OK and then OK again to close the AVI output options dialog.
Step 5 - Setting up the FlasKMPEG processing options
Click on Options/Global Project Options and you'll see this dialog:
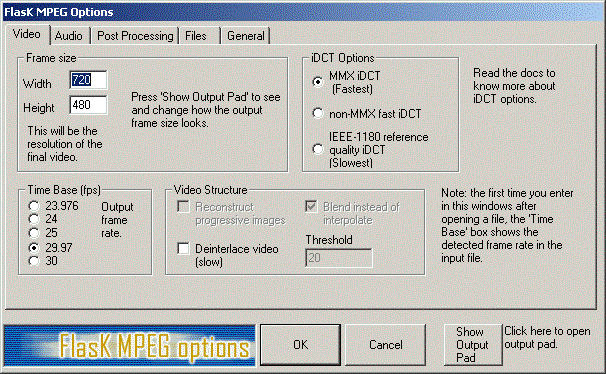
Make sure the Time Base is set to 29.97 since this is the standard for NTSC. The Frame size can be changed depending on what you want to do with the video - in our case, we chose 720x480 since we want to export to DV from Premiere. Also note the Deinterlace video option. If you're going to be generating output targeted at interlaced displays like televisions, leave this option unchecked, but if you're targeting computer displays, check this option.
Next, check the Audio tab:
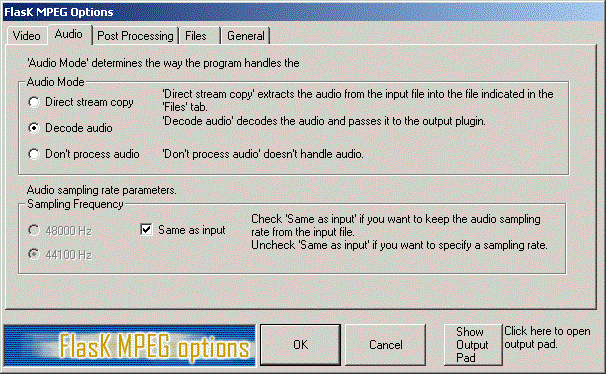
Simply make sure that the options are set as shown, then check the Post Processing tab:

Again, make sure the options are set as shown (you can always experiment with them later) and go onto the Files tab:
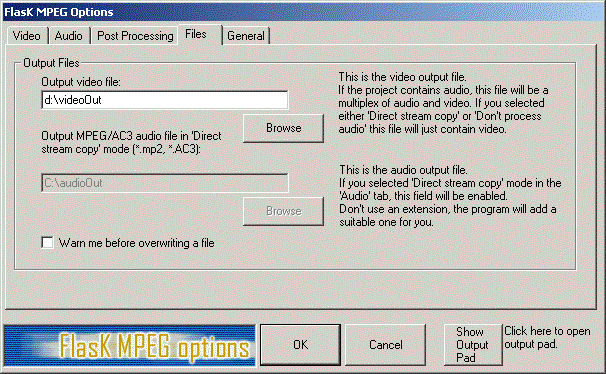
Make sure that there's enough room on the output device for the AVI file - obviously the file size will vary depending on the codec and output size you selected. Finally, go onto the General tab and select the appropriate options:
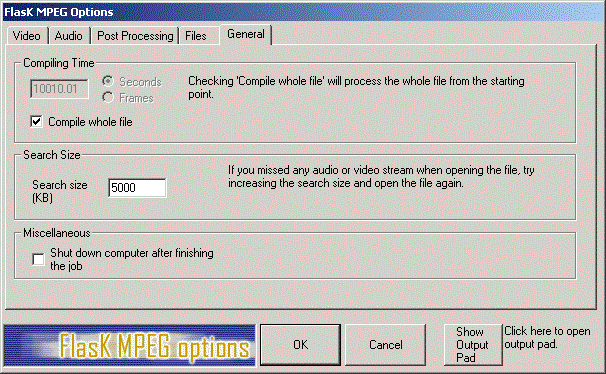
The Shut down option is quite useful if you have a modern PC that has proper power management. You can leave the system running overnight on converting from MPEG-2 to AVI and then have the machine turn itself off when done.
Click OK to return the main FlasKMPEG window.
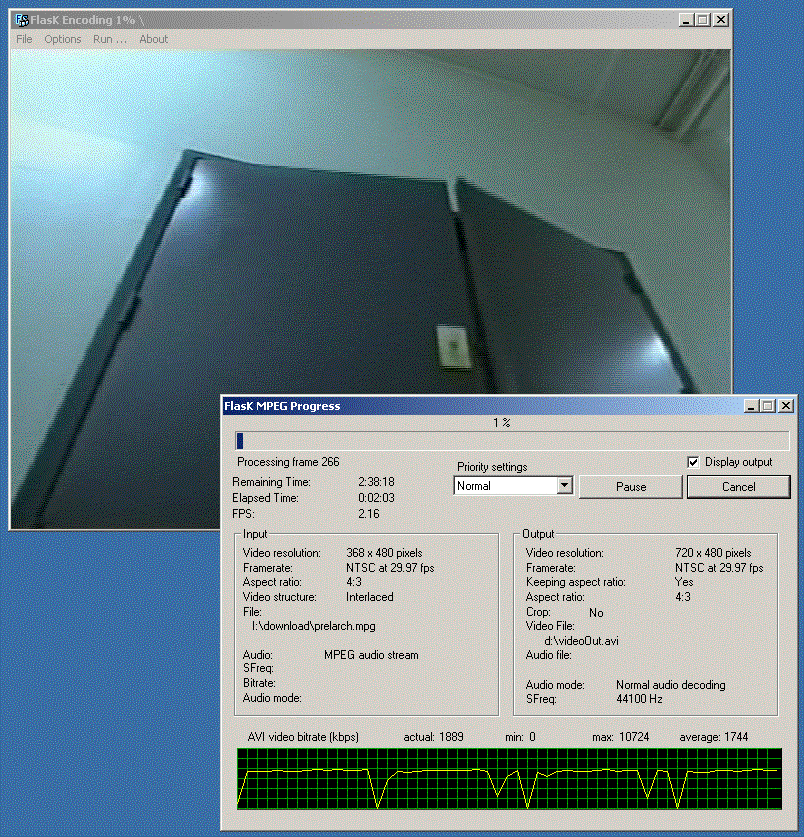
Step 6 - Running the Conversion
Click on Run/Start Conversion and you'll see two windows - one with status information and the other with a decode of the video from the input file. You can now leave it running - if you want to test to make sure that the AVI can be processed by Premiere, you can hit Cancel at any time and still end up with a viable AVI.